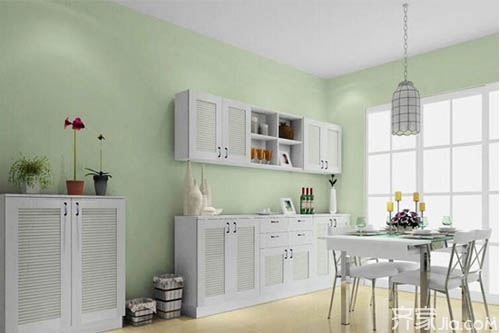
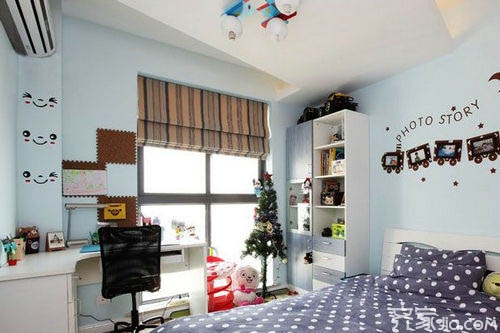
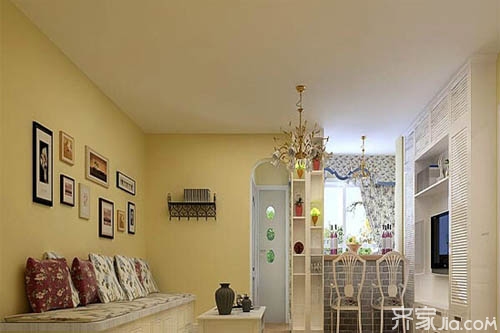
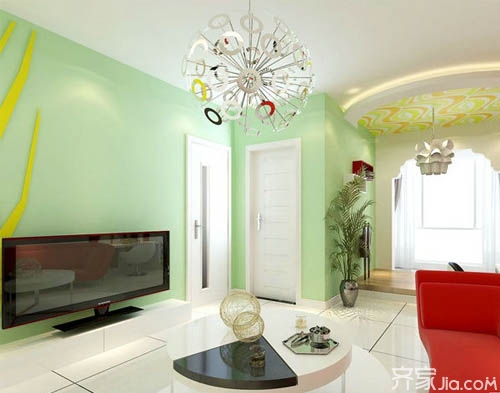
Latex paint, also known as synthetic resin emulsion paint, is a kind of organic paint, a kind of water-based paint formulated with synthetic resin emulsion as base material by adding pigments, fillers and various additives, and is now commonly used in home decoration. . Latex paint is a water-based paint and requires high maintenance and construction conditions. The construction and maintenance temperature is higher than 5°C, the ambient humidity is lower than 85%, and the maintenance time is 7 days (25°C). The low temperature should be appropriately extended. So, what is the construction process of latex paint on the wall ? Let's take a look with Xiaobian! Construction process: primary treatment - full scraping twice - primer - middle coating twice - latex paint finish - cleaning. (1 ) Grassroots treatment: Firstly remove the ash, scum and other debris on the surface of the decoration. If there is oil on the surface, wash it with detergent and water, and then dry it with a brown brush to clean the surface dust; After cleaning the surface, adjust the SG 821 putty to a suitable consistency with a diluted solution of water and vinyl acetate (10:1 mixture), and use it to fill the palisade, honeycomb, holes, and incomplete parts. After the putty is dry, use a knife to level the excess putty spatula first, then sand it with a coarse sandpaper. (2 ) Putty scraping twice: Apply the rubber scraper on the first pass and scrape it. It is required that the horizontal scraping be smooth, even and smooth, dense and smooth, and the line angle and edge be neat. Scratch as much as possible, not to miss the shave, the joints can not stay squatting, be careful not to stain the door and window frames and other parts, otherwise it should be cleaned in time. After the first time the putty is dried, it is smoothed with coarse sandpaper. Pay attention to balance the operation, protect edges and corners, clean it with a brown broom after grinding; The second pass of the scraping method is the same as the first pass, but the scraping direction is perpendicular to the previous putty. Then use coarse sandpaper to smooth the surface, otherwise it must be carried out for the third time and the fourth time. Use 300W solar light to illuminate the wall surface or ceiling surface with coarse sandpaper, and finally use smooth sandpaper to smooth and smooth. (3 ) Primer: The application should be carried out on the surface of a dry, clean and firm layer. Spray it again, the coating should be uniform and must not be missed. (4 ) Intermediate coating construction: If uneven spots are found before the first middle layer of the coating is applied, make up with a putty. The paint is fully mixed with a hand-held electric stirring gun before use. If the consistency is relatively large, dilution with fresh water may be appropriate. However, the amount of water added must be the same for each time and must not be dilute. Then pour the paint into the tray and paint it with the paint roller for the first time. The roller should be brushed horizontally and then rolled longitudinally to remove the paint and smooth it. Rolling order is generally from top to bottom, from left to right, first from far to near, first corner angle, small surface after the big surface. Thickness and evenness are required to prevent the paint from falling too much. The roller cannot be covered with a female corner. It needs to be replenished with a brush and must not be missed. Always remove roller hairs that are on the wall. A wall must be at one go. Avoid overlapping brush trails. Paint that has been contaminated in other areas should be wiped clean with clean water. After the first pass of the middle layer coating, it is generally necessary to dry it for 4 hours or more to perform the next step of polishing. In case of wet weather, the interval should be appropriately extended. Then, use fine sandpaper for grinding. Use lightly and evenly when grinding, and do not wear through the coating. The surface of the grinding brush will be cleaned. The second time the intermediate coating brush is the same as the first pass, but it will not be polished. After brushing, it should reach the general requirements of advanced paints for latex paints; (if the previous putty and the bottom layer of the paint are well treated, the deep brush of this layer may not be applied) (5 ) Latex finish coating: Due to the difference in base material, tooth period, alkalinity and dryness, test spray should be performed on the partial wall in advance to determine the compatibility of the base layer and the coating, and at the same time determine the appropriate coating. Cloth volume; emulsion paint before use to shake the container fully, so that it is fully mixed, and then open the container, fully stirred with a wooden stick; spray, the mouth should always be kept perpendicular to the decorative table (especially in the female corner), distance About 0.3-0.5M (according to the size of the decoration surface adjustment), the nozzle pressure of 0.2-0.3MM2 spray gun zigzag forward, horizontal and vertical cross. Spray gun movement must balance the amount of coating to be consistent. It must not be stopped or moved in time to jump forward so as to avoid stacking, sagging or missing spray. To improve the spraying efficiency and quality, the spraying sequence should be safe: Y-column Y in the wall area. Prefabricated part Y door and window parts, the order should be flexibly grasped, so as not to increase repeated shielding and not affect the finished finish; (6 ) Cleaning: Remove obstructions and sweep splash materials. The above content on the wall surface latex paint construction process Xiaobian introduced here. Are you all clear? More home improvement knowledge, please continue to pay attention to this site information, wonderful at any time for you! Latex paint
Flat Plate Casters provide mobility for a wide spectrum of environments and applications – from heavy duty industrial, to vintage casters used for aesthetic purposes, and more!
As a professional Chinese caster manufacturer since 1988 ,Our offering of plate mount casters covers the spectrum of needs for objects that are best made mobile by connecting the object to a caster plate, also known as a top plate. The caster mounting plate allows for a wider area of distribution of weight load and force compared to their stem mount counterparts, generally allowing plate mount casters to carry heavier weight loads. including rigid wheel caster , Swivel Caster , Brake Caster , size various from 2'' ,3'',4'',5'',6'',8'' Caster Wheels ,Use our filters to find exactly what you need.
Flat Plate Casters,Caster Wheels,Performa Wheel Caster,Creeper Caster Zhejiang Lingda Caster Co., Ltd , https://www.ldcaster.com